Things can get pretty repetitive with a baby (ugh) so I’m always looking for new ways to entertain my little boy. Today I came up with my own version of a water shaker toy. The great thing about this ‘toy’ is that it was just put together with a few things I had around the house – an excellent way to repurpose some items without the need to spend a cent!
Here’s what you’ll need: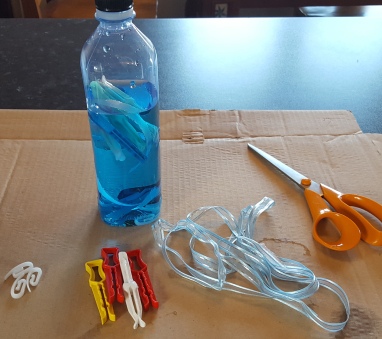
- an empty plastic water bottle, preferably with a tight lid rather than the pop-top kind (this one was made from cornstarch so is BPA free too)
- water and some food colouring
- a few plastic laundry pegs
- some bits of ribbon
- any other bits and bobs that will fit in the bottle – I used some beads, bits of shell and some plastic curtain hooks 🙂
It’s as simple as throw everything in the bottle, fill halfway with water, add a drop or two of coloured food dye, screw the lid on tightly and hey presto – a new toy! By filling the bottle only halfway, my boy will get to experience the way the moving water affects the bottle’s weight. And another great thing is that the different items have different densities – some float and some sink. The ribbon swirls and curves nicely around too, adding extra visual interest!
I can’t wait to see what the little guy will make of it later this morning…
Do you have some good DIY baby toy ideas? I’d love to hear them!!


Neat!
LikeLike